|
||
|
||
| ||
|
||
|
||
| ||
Since Talbot times (1835) and the appearance of two-stage negative-positive process, photographer's job inevitably has to do with copying. Film has been existing for a long time as well. Its creation has to do with works of Godwin (1887) and Eastman (1888), their priority dispute ended in Godwin's patent for films in 1898. Cinema gave an impetus to the development of copying films in order to replicate products for the maximum audience. Contact copying was the first method. But the necessity to scale copies versus the original size resulted in the appearance of various methods of optical copying using a camera or an enlarger, invented by photographers. The appearance of reversal materials did not withdraw the copy issue, as photographers had to create copies of their masterpieces for distribution. Halftone autochromatic plates, invented by brothers Lumier in 1907, became an additional (though not determinant) impetus to the development of optical copying. Contact copying cannot be used with them by their nature (randomly placed colored gelatin grains), as you cannot align grains of the same color on contacting plates. (In fact it should be added that the first half-tone photography was patented in 1892 by G.Jolly). Note that contact copying still remained the main method for a long time. In my opinion, it played an important role in the appearance of multilayer color emulsions, which had completely replaced halftone photography by the middle of the last century. In digital era the copying issue has been solved once and for all - a copy is no different from an original. But the question of continuity (that is converting images into digital form) remains in abeyance. Identity is out of the question here, we can only operate such terms as sufficient or redundant data. Digitation process itself is also very old, as it has been traced to phototelegraphic devices. Modern drum scanners are practically no different from the first phototelegraphies and cope well with this task. The appearance of popular and relatively cheap digital SRL cameras gives photographers a chance not to buy a scanner to convert their archives to digital form, but to try and capture them with a camera. This solution has evident advantages. Firstly, you don't have to spend money on the device, which is on a par or even much more expensive than a digital camera. Secondly, it does not require special skills, as retaking photos is essentially closer to the day-to-day work of a photographer than scanning. You can work with films of any format. Unlike a scanner, there is no resolution limit: you can always capture a fragment with such zoom that all the details on a slide will be digitized. A scanner captures only a single line at a time and a camera can similarly capture a slide in several pieces - "scan" any slide. You will have no problem with dense slides - a flash or long exposure will allow to capture all the film details. And finally, many photographers have such large archives that it will take more than a lifetime to scan them. While capturing films may be rather quick. Theoretically, cameras with non-removable lens can also be used for capturing films. But they cannot really compete with scanners, just a better-a-small-fish-than-an-empty-dish solution. You can read about how to use cameras with non-removable lenses with devices, described here, in the article Keplerian telescope - a macro converter and a camera gun combined. For over a hundred years of incessant copying, photographers invented a lot of devices to facilitate this process. Contact copying obviously cannot be used for digitizing photos. Capture unitsThese devices can be divided into two main groups: 1:1 capture assemblies and photographic enlargers. The photo below shows a classic structure consisting of camera Zenit, a close-up attachment PZF, Gelios-44 lens, and diareproduction attachment PD. 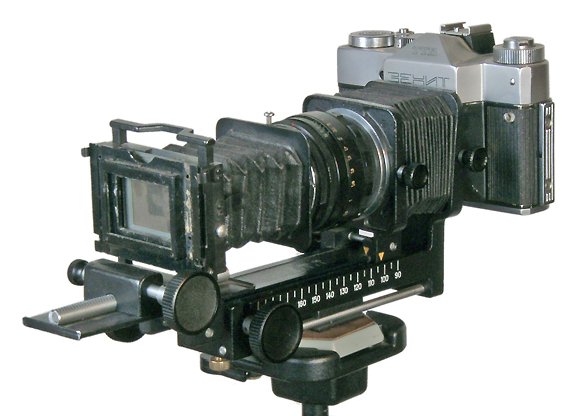  Diareproduction attachment PD is designed for 35 mm films or transparencies in 50x50 mm frames, it's mounted on the running rail PZF. It's originally equipped with a ground glass, but its matting is so rough, that the grain becomes visible on a copy at strong apertures. That's why it's removed on the photo. We suggest using a milk glass or even a sheet of paper as a diffuser. But they should be placed rather far from a film, so that the structure and heterogeneity are not visible even at maximum depth resolution. If a matrix in your digital camera has the same size as the 24x36 mm slide, like Canon EOS 5D, Canon EOS 1Ds, you can just buy the M42-EOS lens adapter and install this digital camera instead of Zenit. But popular and relatively cheap cameras have matrices close to 15x22 mm, such as Canon EOS D30, D60, 10D, 20D, 300D, 350D, Pentax *ist D, KONICA MINOLTA DYNAX 7D and 5D, Nikon D50, D70, D100, Sigma SD9 and 10. These cameras, if installed instead of Zenit, allow to capture only a central part of a slide or smaller slides, including the smallest ones - I wrote about it the article about Minox cameras. But you will have problems capturing a 24x36 slide with a 15x22 mm matrix. The 1:1 optical scheme is a symmetric assembly with the distance from an object to the lens and from the lens to the matrix equal to two focal distances. Focal distance of the Gelios-44 lens is 58 mm, the minimal distance between the lens and a film in a PZS attachment is 90 mm. That's not enough to fit an image on a matrix. Thus, there are two ways to get necessary dimensions. Either to use a lens with a long focal distance, for example, Industar 100, or to adapt the attachment to move the lens closer to the camera. 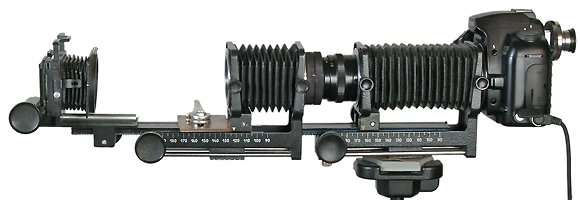 Long focal distance allows to place the lens at a necessary distance from the camera. However, the rail length is insufficient to place an object at the necessary distance. The rail on the photo is made longer by another PZF attachment. That is PD is fixed to the rail of the second attachment, the Industar 100 lens with lens adapters acts as a link between the two attachments. Bellows of the second attachment can be used as an extensible blend.  The other option is to embed the lens into the bellows and thus to reduce the distance to the camera. You can read the details in the article "Trying to squeeze maximum from an optical system". The main disadvantage of this design is an inconvenient process of changing the aperture. 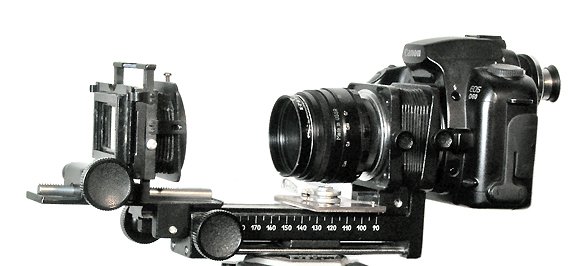 You can remove part of the bellows and move it a centimeter closer to the camera. Cutting the bellows cannot be undone, it will allow to take photos with smaller dimensions, but it will reduce the maximum zoom, as the bellows length will be insufficient to be stretched to the entire length of the rail. 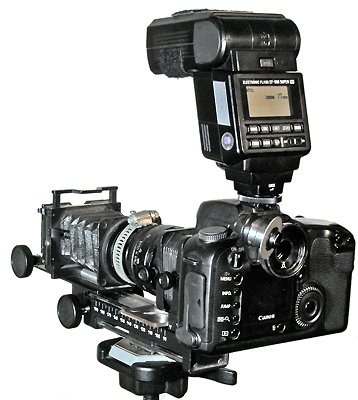 On the whole, this construction is rather successful, one of its additional advantages is an automatic coordinated flash, installed right on the camera, without additional cables. In this case the attachment is placed in front of a white reflecting barrier at half meter from the attachment, the camera uses a preliminary flash to estimate the necessary impulse to make a correctly exposed shot. But there are not only 35 mm films, but also larger films, for example, 6x6; 6x4.5 cm. In this case you should take advantage of technical solutions of a standard enlarger for printing photos from wide films as well as from 35 mm films. Fortunately, photographic paraphernalia from various companies used to have a lot of common standards. That's why I managed to assemble several assemblies based on Polish Crocus enlarger, macro bellows Pentacon, and PZF attachment. 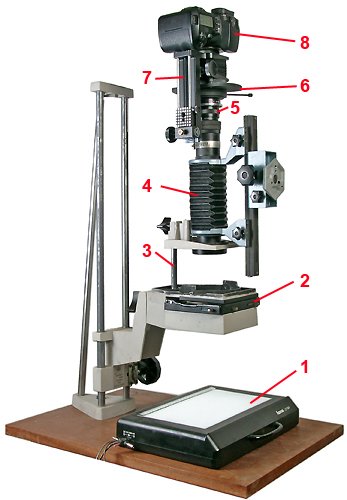 That's how it looks like:
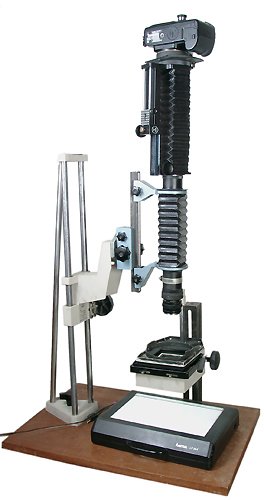 The photo shows a system that sums up extensions of PENTACON bellows and PZF, located between the camera and an object, which allows to get maximum enlargement for this assembly. On the whole, this assembly is good, but the enlarger lens positioning system is too fragile to move the entire construction instead of just a lens. 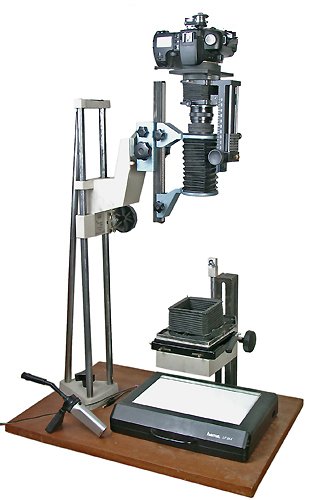 Assemblies with an independent slide holder mount. Lens moves along robust rails, initially designed for moving the lighting unit of an enlarger. The photo shows a system with two bellows, similar to the one we described above. 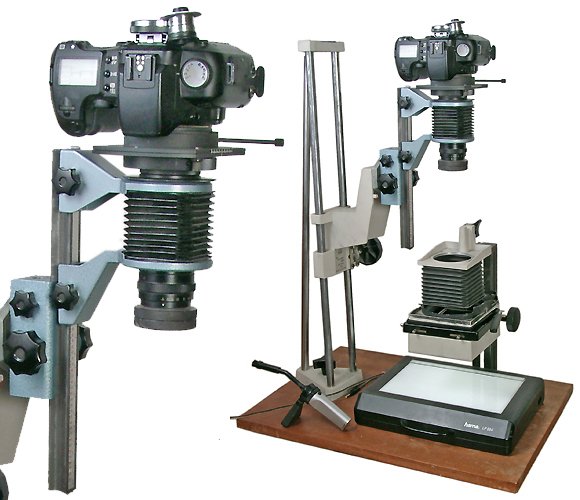 The photo shows the simplest and thus the braced structure - in the long run I decided in favour of this very structure. PENTACON bellows do not have extension fine-control, so you have to move the camera with the lens relative to an object to focus on it. Coarse adjustments are made along the enlarger's rail, for fine-tuning you can use a sledge bonded to the PENTACON bellows. Enlarger's bellows are used as an additional blend to protect from flares, caused by room illumination. Dust is the eternal enemy of photographers. One of the ways to fight it is a miniature vacuum cleaner, which is on the enlarger's table on the photo. 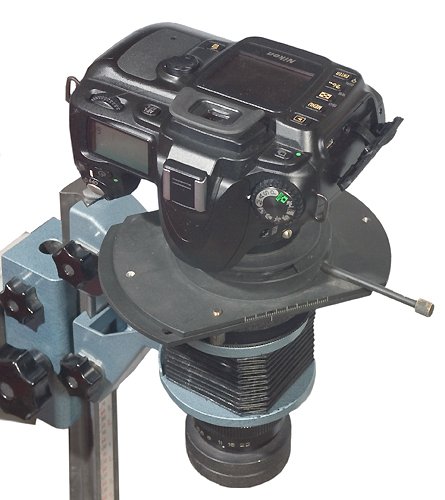 Nikon camera mount poses no problems in this case. Flange focal distance longer by 2.5 cm makes no difference in macro mode. Any M42-Nikon adapter would do, as you don't have to focus to infinity. Besides, we do not use a camera lens with a 45 mm flange focal distance, but the long-focus (110 mm) lens Industar 100 from an enlarger. You can see the Jolos attachment well on the photo. It can be rotated relative to the lens, the camera can also be rotated around it. You can rotate the attachment at 45 degrees and easily focus at any of the four corners. If you don't want to stitch an image from several slides, the question whether you had better move the camera in focal plane or the lens together with the camera relative to a slide remains in abeyance. In this case we use a lens, designed for wide films. That's why there is no noticeable difference between these two images. In case of a lens for 35 mm film, you should consider placing the attachment before the lens and moving the lens and the camera together relative to a slide. CapturingRemote Control and Camera SettingsYou should use a computer for controlling your camera when capturing slides. This solution, as any cable release, prevents the assembly from jolts when you capture slides and immediately shows you the result on a large computer monitor. The latter is very important as it allows you to see the mistakes, which could have been easily missed on a camera display. If a camera is connected to a computer via USB 1 (Canon D60), it takes 53 seconds to transfer a RAW photo from a 6 Mp camera, a JPEG file takes 20 seconds to transfer; in case of USB 2 (Nikon D50) - 6 and 4 seconds correspondingly. To control old Canon cameras, you can use Remote Capture. The latest cameras can be controlled via EOS Capture. 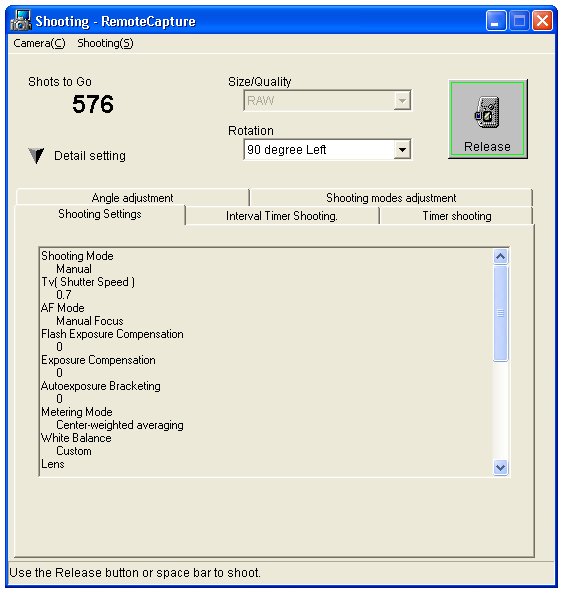  Nikon cameras are controlled with Nikon Capture utility. Nikon D50 Guide runs that Nikon Capture 4.3 or higher (to be bought separately) can be used to control your camera from a computer. The camera comes shipped with just a 30-day trial version. But this present will not allow you to evaluate remote camera control, as my bundle included Version 4.2, which did not detect this camera. This problem can be easily solved, if you have Internet access, but it still left bitter taste in my mouth. The program allows not only to take photos, but also to change exposure, file format, etc. Besides, it displays overheads, which is shown in a camera viewfinder. Together with fast data transfer via USB 2, it slightly sweetens the lack of aperture priority with lenses without a microprocessor. 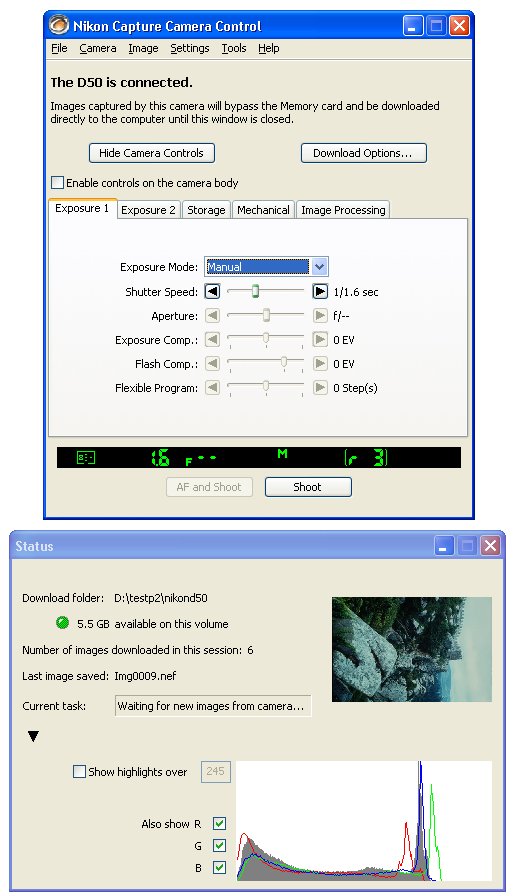 You'd better use RAW for single slides. If you need to digitize your photo archive or you plan on stitching several slides into a single image, perhaps you should use JPEG, having properly configured your camera. You should reduce contrast and correctly adjust white balance, as it depends on not only a lamp, but also on film that you capture. When you stitch several slides together, you shouldn't rely on automatics, as it may evaluate different fragments differently. It refers not only to camera automatics, but also to automatic RAW conversion. Stitching several slides into a single imageIf you move the camera relative to the lens, there will appear no distortions to be corrected when you stitch slides. Jolos, described in detail in our articles (read here and here), allows to do it. Images can be easily stitched in any graphics editor. You can also use utilities for stitching panoramas. In this case you should choose "Images Scanned in Sections" in the menu. For example, that's how it looks in PhotoStitch that comes shipped with Canon cameras. 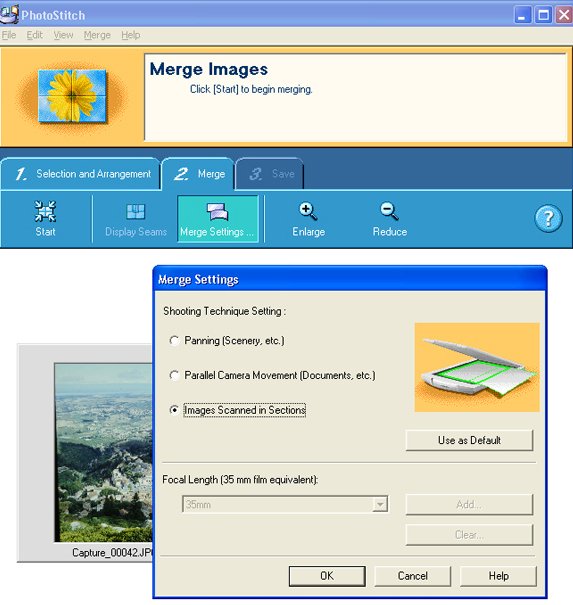 That's how it looks in The Panorama Factory (to be bought separately): 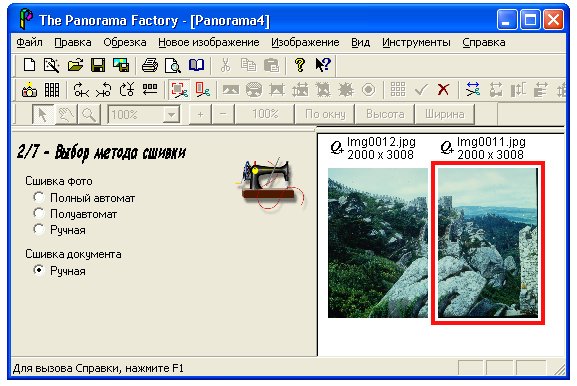 You can also use open source programs, based on Panorama Tools, created by Professor Helmut Dersch. My PhotoStitch version worked rather well in manual mode, it allowed to stitch linear as well as mosaic panoramas. Unfortunately, it cannot work with 16-bit files, that is if you capture in RAW format, you have to adjust images before stitching, which requires great care, lest you should unnecessarily process parts of the same panorama with different algorithms. In this case there may appear problems with brightness and color transitions between bordering slides. The Panorama Factory can work with 16-bit files, but only in linear panoramas. Programs, based on Panorama Tools, offer all necessary features, if you know how to use them. By the way, they can work under any operating system. DebriefingCapture resultsLet's take a 4.5x6 photo taken on Kodak E100SW film with a Zenza BRONICA ETR Si camera with Zenzanon PE 2.8/75 lens and try to find out how small a fragment can be captured and whether it's worth capturing. That is the eternal question of these times: how many pixels do a slide contain? The image shows rectangles, corresponding to subsequent enlargements. Image of the entire slide
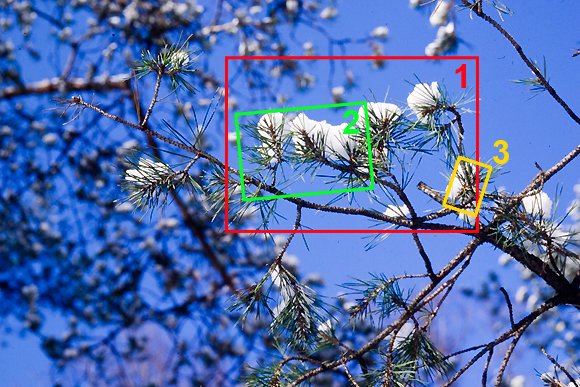 Miniature of the entire slide. The entire slide is 2048 x 3072 pixel, if captured by a 6 Mp camera, or 2941 x 4357, if captured in 3 sections.
Enlargement 1 The image contains a fragment of the source slide. Linear dimensions in pixels are increased by 2.3 times compared to the whole image. Miniature of the entire slide.  1:1 fragment  To show you the frontier, we publish an image of the test chart with the same enlargement on Micrat 200 film, which has a much higher resolution and allows to evaluate image quality on the quantitative level - by counting rings on the test chart. 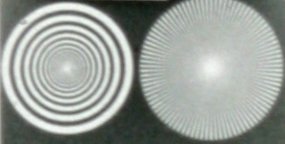 In this case we can see 5 black rings.
Enlargement 2
Linear size in pixels is increased by 4.1 times compared to the image with a whole slide.  1:1 fragment 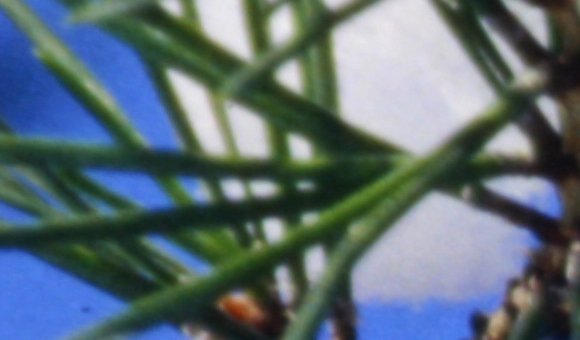 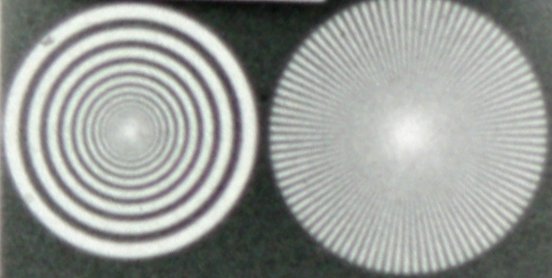 In this case we can see 7 black rings.
Enlargement 3 (10x)  1:1 fragment 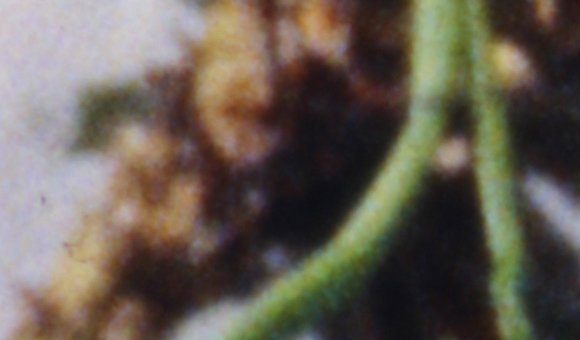 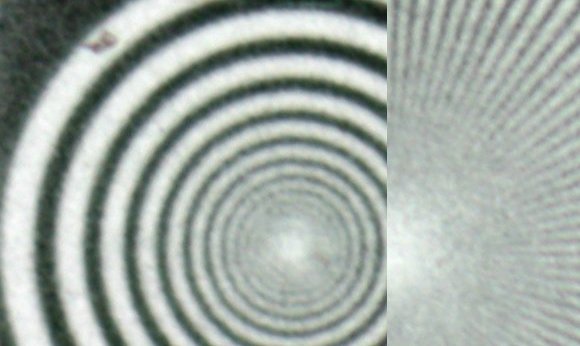 In this case we can see 9 black rings. The last rings are barely visible.
That's the end of enlarging capacities of our assembly. The test chart can be captured with larger zoom using a microscope and an assembly, described in the article "On the history of cameras, standards and self-made cameras". 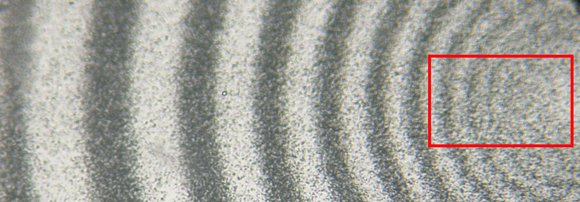 Microscope examination of the slide miniature. Nine rings are visible.
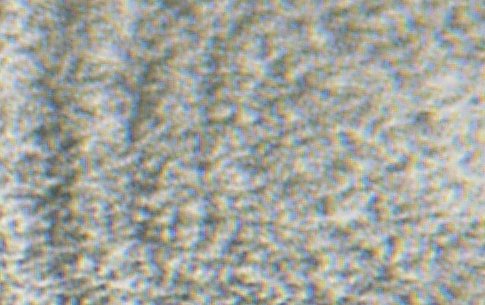 The grain is a mighty distraction. If we have a look at the 1:1 image (lower fragment), the rings are even more difficult to make out than on the miniature. It's easier to count the rings on a slightly unfocused or shrunken image, though the image obviously contains less details. In order to take it all with the perfect tool, we get from mother nature, we should stand back from the screen - now we can see them. Do you need this zoom? Perhaps you do, if you know what you want , as in Antonioni's "Blow-Up". But you may actually fail to convince other people of what is on the photo. The film contains redundant information, which is not necessary to a spectator, but useful in terms of optical transformations when you enlarge photos or process them in a graphics editor. Maximum quality is achieved by scanning or capturing slides with excessive quality, subsequent processing, and then shrinking the image before displaying it on screen or printing. In this case, the shrunken image retains all valuable information, visible only when zoomed, but parasitic and distracting information that has to do with the grain and matrix noise is removed. It can be compared to scanning printed bitmap images in the moire removal mode. 
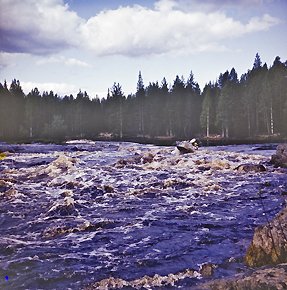
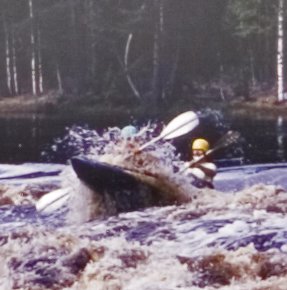
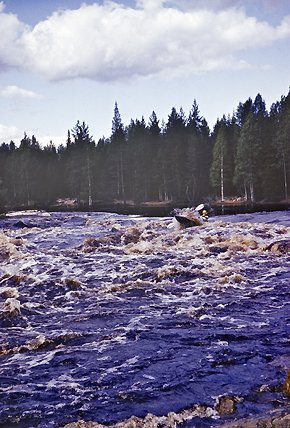
 Comparing Fragments 1 and 3, captured with different zoom and shrunken to the same size. Here are a few considerations, which may come in handy when calculating necessary magnification for capturing. At first you should determine the size of a dot on the slide. This size certainly depends on an image and on the photoemulsion type. Image is created by silver crystals. Diameter of a circle on the film (when you can distinguish two neighboring points on an image) depends on their number and size distribution. In the extreme case of a line image, a black dot is a single crystal of silver, a white point - the lack of a crystal. That is it has to be enlarged so that each crystal is visible. If our image contains 10 halftones, diameter of the circle on the film must hold at least ten crystals of silver. In this case the circles with 1-10 crystals will allow to make out ten shades of gray. In case of a 8-bit image, we may register 82 = 256 shades; that is the minimal circle on the film, worth looking at, must hold 256 crystals of silver. (Of course, assuming that they are of the same size. In a more general case with variable crystal size, a circle must hold crystals with the total area exceeding the minimal crystal by 256 times). In case of color multilayer film, this circle must be focused into a 2x2 pixel dot on a matrix. Its surface area will correspond to 4 pixels, covered by 3 different filters. (Color multilayer films contain no silver, it's replaced with dye). Now, in order to get a correct image, we should average the values of 4 pixels and determine the dot color behind a corresponding filter, then the image may be scaled down twofold without losing information. That is in the ideal case, a 8 Mp matrix may capture a slide sector with two million circles, described above. Even though the details are not lost, many users are often reluctant to shrink images. Taking it into account, polygraphic workers require the notorious 300 dpi, which exceeds capacities of most printers twofold. There is no point in reducing the resulting image, if a dot on the image is smaller than a matrix element. In this case we'll lose some dots with correctly registered brightness. What concerns colors of small details, it will be averaged by two neighboring dots, which may be of different colors on the original image. Thus, if in the extreme case an image contains 12 million dots (4000 x 3000 meaningful dots), you'll have to take more than 8 pictures with a 6Mp camera. But if we are ready to save only half of meaningful dots, we need to take only one photo. Capturing archive slidesCapturing your archives in long winter evenings will allow you to travel in space and time. In conclusion, several examples with our comments what can be expected from old slides. 1977. Dombai, ORWO CHROM UT 18 film, Zenit E camera, Gelios 44 lens. Captured by Canon D60 camera with Industar 100 lens. 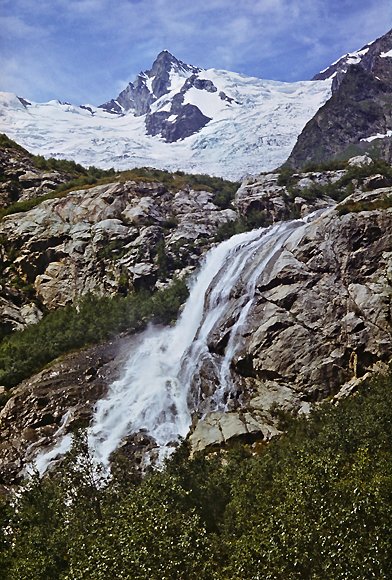 The quality is surprisingly good. Stitching the image from three photos is well justified. Perhaps, it has to do with fine-grain of the first developer. I don't remember what I used to develop this film, but at that time I might have used original sets for processing ORWO films. It makes sense to reduce the image to 8 Mp after processing it. The resulting image is nearly perfect - that is it's close to the image consisting of meaningful dots only. Removing dots from that image will result in the deterioration, both informational and spectacular. 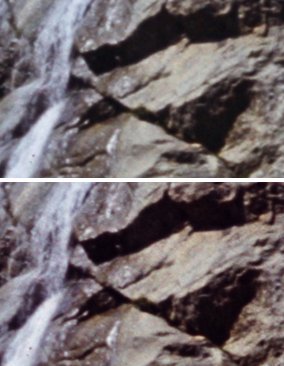 Fragments of two photos, reduced to the same size. Top image - 70 % of the original (8 Mp photo), bottom image - 49%. As a result, we can notice that the micro contrast of the bottom image is higher, but it's hard to make out after we compressed it into JPEG to publish online. That is we can capture it with larger zoom, but this game is not worth the candle. 1981. The Shuya river, ORWO CHROM UT 18 film, Lyubitel 166 camera. Captured by Canon D60 camera with Industar 100 lens.
If we fit the entire square slide on a matrix, we'll get a 1900 x 1900 pixel image.
The quality is barely enough for framing and capturing a 4.5 x 6 cm fragment. The resulting 2048 x 3020 image is quite adequate to the image on this slide. There is no point in further enlarging the image. The limit has mostly to do with the lens quality. The same here, but I used DS4 negative film in this case
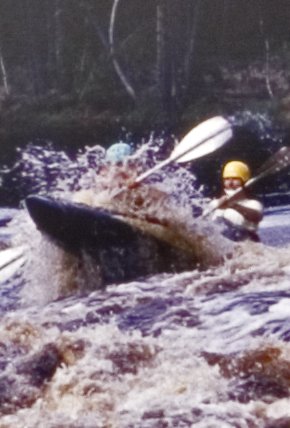
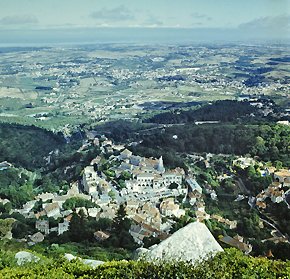
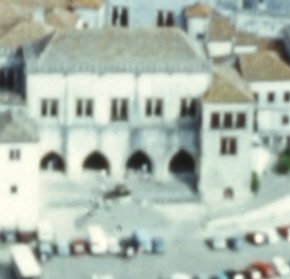
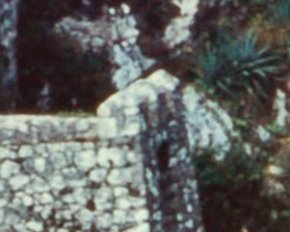
The resolution is similar, but it's determined not only by the lens, as the film structure is noticeable even at this zoom. We should use some program to reduce noise, for example Neat Image (Of course, profile should be created for a given film at certain zoom level. In this case we can ignore the matrix noise). I publish this photo only to show that processing negatives brings no complications to the workflow. It's easier to work with masked films than with unmasked ones. But the era of masked films brought photo labs, so it's better to convert these photos to digital form from 10x15 cm prints. Domestic-made prints on unmasked films are not preserved well. Besides, I did not make prints from all slides, as the process was laboursome. By the way, takes that had been initially rejected due to excessive or insufficient density were often better preserved and suitable for digital processing. In this case the entire processing comes to image inversion and its automatic adjustments. 1988. Portugal, ORWO CHROM UT 18 film, Kiev 88 camera, Mir 38 lens (F=65 mm). Captured by Canon D60 camera with Industar 100 lens.
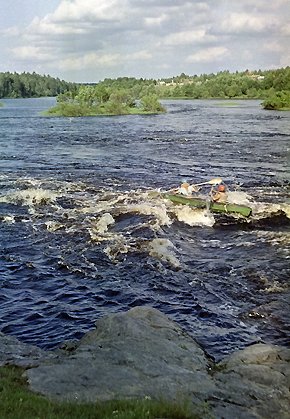
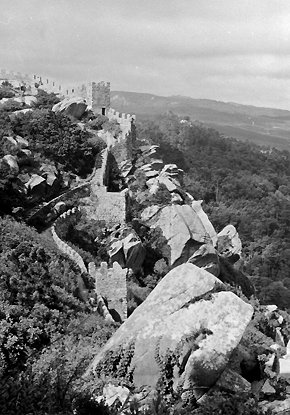
The situation is a tad better than in the previous case, we can easily cut the smaller fragment, but stitching an image from more than two photos is not justified. 1988. Portugal, ORWO CHROM UT 18 film, Kiev 88 camera, Volna lens (F=80 mm). Captured by Canon D60 camera with Industar 100 lens. The photo is taken from the same point as in the previous case.
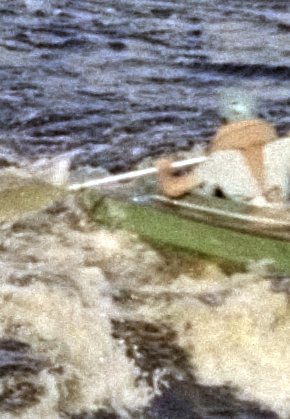
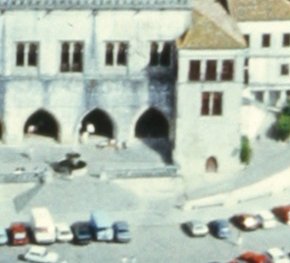
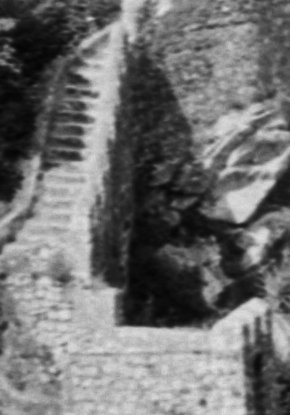
If we stitch an image from 6 slides and then shrink this image to the size of an enlarged image, which longer frame side matches the square side, we can see some quality improvement. If we don't process this image, it evidently contains excessive dots, which do not add information, but make this image look untidy. Thus, we can say that a wide photo, taken on ORWO film with a good lens, contains 9 Mp. But to get this photo, we should get a 16 Mp image first. Taking into account the overlapping required for stitching, you have to take 6 photos with the total area of 36 Mp to get a rich image with all object details, but without film grain. 1988. Portugal, ORWO CHROM UT 18 film, Kiev 88 camera, Volna lens (F=80 mm). Captured by Nikon D50 camera with Industar 100 lens 100.
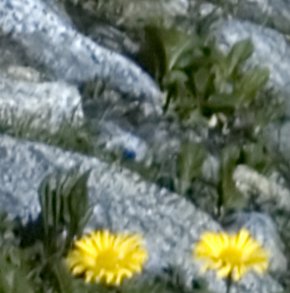
1988, Portugal, Photo 65 negative film, Kiev 88 camera, Volna lens (F=80 mm). Captured by Nikon D50 camera with Industar 100 lens.
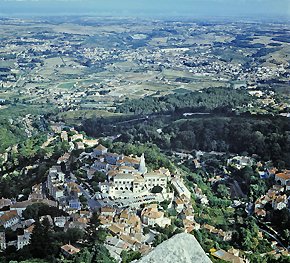
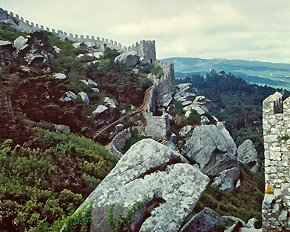
1995. Khamar-Daban Range. Baikal reserve. Kodak EPD 100, Mamiya 33 camera, F=65 mm lens. Captured by Nikon D50 camera with Industar 100 lens 100. The original has high density, most scanners cannot convert it to digital form with enough details in shadows.
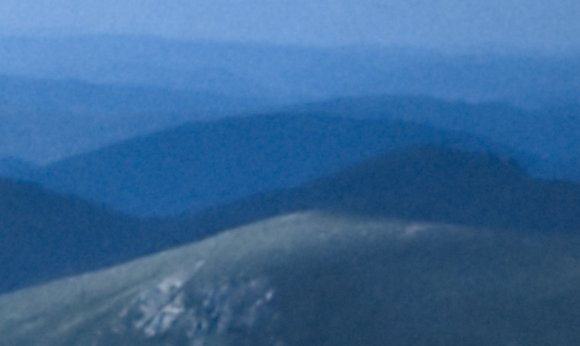 P.S.So, what can we expect from archives? In the majority of cases you can get an image, which is not worse than an original photo taken by a 6Mp digital camera. You can sometimes get much better quality. But it depends on so many factors - film, developer, development mode, lens, aperture, camera, - that it's hard to forecast the results. Photos taken with medium format cameras offer insignificantly better quality versus 35 mm cameras and much smaller spread. That's because 35 mm cameras had been always intended to catch up with popular medium format cameras, they succeeded thanks to high-quality lenses and fine-grained films. But in most cases, photographers, who still used their medium format cameras, wanted to get stable, not record-breaking results. That's why they used more sensitive films, being of the opinion that they would get the required quality even with larger grain thanks to the slide surface area. Photos taken with expensive medium format cameras on a low-speed film in ideal lighting conditions are an exception. In the majority of cases, you'd better capture a single properly framed shot with a 6-8 Mp camera. An image has to be stitched, if you don't know how to cut a square slide or if you want to preserve the ratio. In this case two images would usually do, though as we have already mentioned, you'll have to take nine or more shots to capture all details on a slide. An enlarger is a technically well thought-out device, which can be used as a basis for an assembly to capture slides with any modern digital SRL camera. In this case, you actually use only a matrix and a viewfinder for manual focusing. Considering quite comfortable shooting conditions, there is no principal difference what camera to use. Cameras with USB2 interface have an additional advantage for using them with a computer. Perhaps it would have been even more convenient to focus looking at a monitor and giving up the optical viewfinder for good. But there are practically no production-line cameras with this feature. It's theoretically possible in Canon 20 Da and FUJIFILM FinePix S3 Pro cameras. I rely on my experience with a home-made 3 Mp camera in this respect. The camera is kindly provided by the representative office of NIKON SVENSKA AB
Write a comment below. No registration needed!
|
Platform · Video · Multimedia · Mobile · Other || About us & Privacy policy · Twitter · Facebook Copyright © Byrds Research & Publishing, Ltd., 1997–2011. All rights reserved. | |||||||||||||||||||||||||||||||||||||||||||||||||||||||||||||||||||||||||