|
||
|
||
| ||
|
||
|
||
| ||
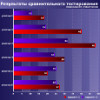
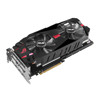
 A new camera of Kodak series, it does differ not only from its predecessors Kodak DC 260/265/290 but also from other 3-megapixel brothers. As for its old fellows, it differs in design and in a lack of possibility to use scripts for expendable camera control. And as for other 3 megapixel cameras, in first turn, it differs in a shot format, 2160X1440 pixels, that is 3:2, what in fact corresponds to the ratio of a standard postcard (15X10 cm). 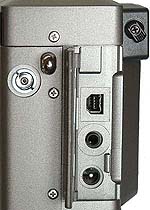 The design of the camera is very similar to its film brothers. But it is equipped with quite a big lens tube which in fact contains not only a lens itself, but also a matrix. The whole optical part is located there. The camera doesn't have a thread to install color filters, but there are adapters which can be attached to the tube in order to place there color filters and afocal attachments. Unlike other cameras, a lid of the lens is put over retractable part of the lens (and not on the tube). The camera is equipped with an integrated flash and a standard jack to connect an external one. 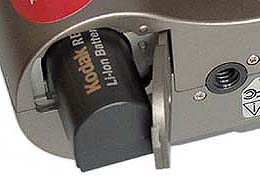 An optical viewfinder can be adjusted for the photographer's eyes in order to make photos without his glasses. The camera can be connected to a stand, but the hole is located too close to an accumulator module and an arm for ejecting a memory card Compact Flash. That's why you won't be able to replace accumulators or a memory card without deconnection the camera from the stand. Probably, when working in studio you should use an external power supply unit and then copy the photos to your computer. Main functions that will be used most often are called for with a turn of 2X switches. One big wheel allows passing to a shooting mode with aperture priority from an automatic mode. The second switch allows setting expocorrection. A wheel of an aperture choice seems to be an analog to a mechanical ring of setting an aperture on an objective. But it's not true since the figures on this ring correspond to the reality only for shoot, when the lens focal length is minimum. When changing lens focal length the values of aperture change as well. So, if you set 2.8 for the aperture it will be so with 6 mm of lens focal length. If you set the focal length to 18 mm, the aperture will be 4.5, though the ring would indicate 2.8 as before. In case of a complete analogy to mechanical aperture setting, it would have been just a aperture diameter that is fixed. Since an aperture value is a ratio of a focal length to aperture diameter, then, with the fixed diameter a 3 times increase of focal length would result in 3 times higher aperture value, that is 2.8 X 3 = 8.4. In this case it is not so since an aperture diameter changes together with an lens focal length. But since the installed lens doesn't allow working with a maximum aperture at all focal length values, 2.8 corresponds to a maximum aperture with a chosen (by you) focal length. All other figures are obtained by multiplying this aperture by square root of 2. So, one-step turn of the aperture ring causes an exposure change in 2 times. It's OK if you are working in the mode of aperture priority. In manual mode there can appear troubles. Before you pass to manual mode you should enter the menu and set an exposure. However, if you have already set the required exposure, you can't change focal length of lens, since the real aperture would change. If you are working with 6 mm focal length, you can use an exposure-meter to set the required values of exposure and aperture. If you are going to change the focal length afterwards, a shot would be underexposed. Some functions can be set only in the menu on LCD screen. 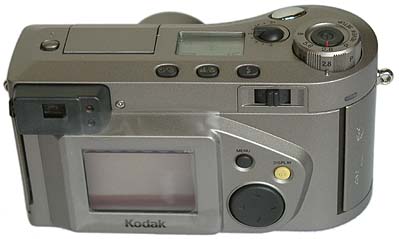 The menu is quite beautiful, though the screen area is not very covenant: a function name takes the most part of the screen, and values are to be set on the next screens. 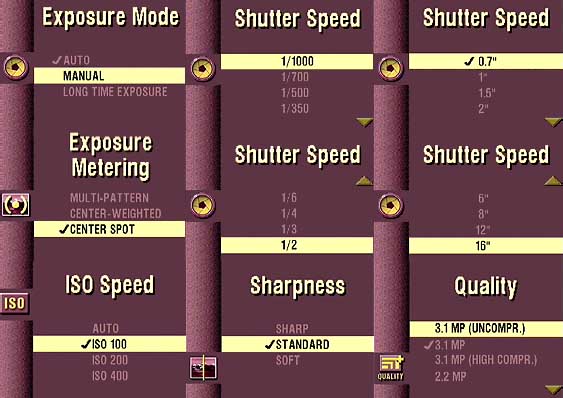 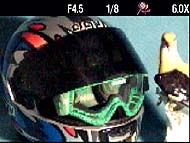 The picture shows 9 screen menus intended for parameter settings. When taking a picture, on the screen you can see exposure and aperture values and multiplicity of focal length change, including when using a digital zooming. In order to receive information on a taken picture you must look though 5 screens. Other functions are more or less standard including a possibility of watching a picture multiplied 2X and 4X. 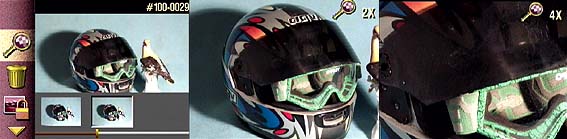 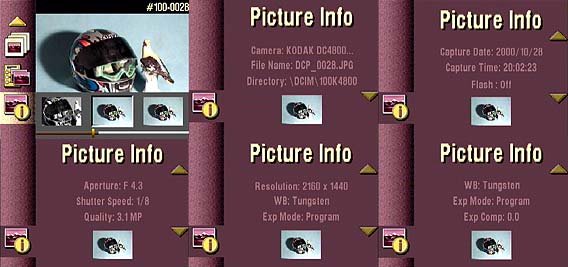 This camera is perfect for working with computers. This looks like a bonus for that the connector for memory cards of type I can not use IBM Microdrive. The camera is connected to a computer via USB port, and there is possibility to control the camera completely: you can set exposure, aperture, lens focal length, to switch on flash, to take pictures, to write taken pictures on a computer, to delete files with pictures on a memory card, - that is, all things that you can do with the help of buttons and a menu of the camera itself.  Parameters option.  Exposure and aperture setting.  Lens focal length setting.  Shoot. When working in studio it's quite important to fix image focusing. For example, you are making an animated cartoon and for some successive scenes you want your main personages to be sharp, not a background. The camera can't manage to do it itself. The only possibility to fix the sharpness is to set infinity, what is useful when working in the nature, but it doesn't help in studio. Besides, the camera can't serve as a universal device for reading Compact Flash memory cards, and the pre-image can't be viewed on the computer. That's why first you should take a picture, and then to look at it on the computer in order to check weather you set your camera right. With the software installed you can view miniatures of photos in usual holders. In properties of a file with a picture there appears a tab Picture. Click on it and you will be able to view the parameters of shoot. 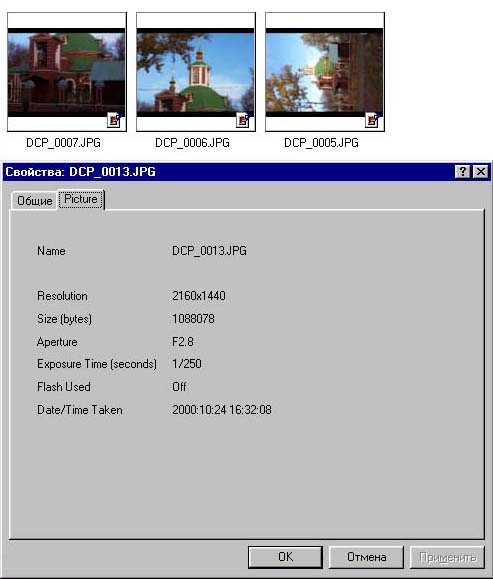 Miniatures are booted quickly, but there is a problem - the program replaces standard means of miniature creation by the faster ones, which are of low quality and it don't work with JPEG files that are created with other programs. 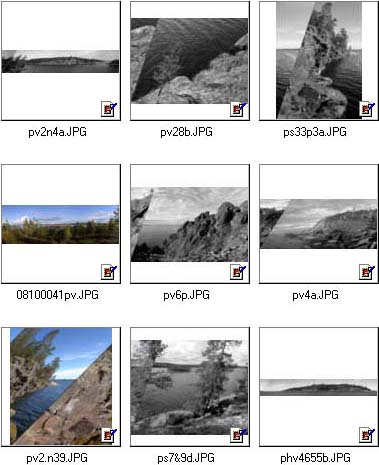 However, the program keeps the old values in a register when making changes, so you might recover them.  You should transfer the values from the second line to the first one, and you'll come back: 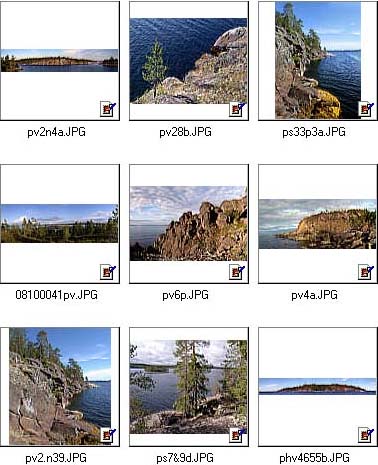 TestsMatrix sensitivity with ISO 100. We took picture of a gray area. The obtained figures were then compared with the figures of an exposure-meter of the camera Canon EOS 50. So:
No comments:-) Resolution. The shoot of the resolution chart (mire) showed quite decent quality of the objective and the matrix, the resolution depended on the channel quite strong at that. Black and white strokes are two strokes. At the resolution 0,7 stroke/pixel we received 1500 stripes in width and 1000 in height. 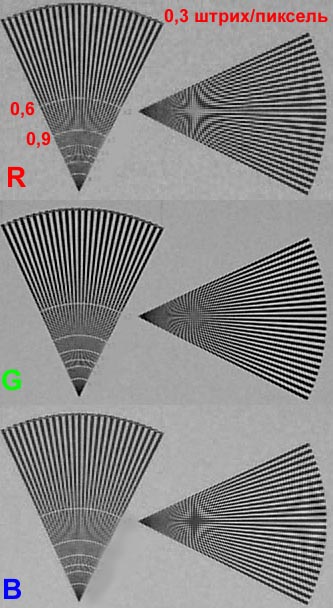 Three million pixels in modern cameras stand for the total number of sensing elements. In front of them there are filters of usually 3 colors, which pass blue, green and red components. In this camera the largest number of lines are resoluted in green color. The first historical excursus1782 - Senebier observed blue coloration when irradiating argentic chloride by violet rays. 1810 - Seebeck lighted a wet layer of argentic chloride with spectral decomposed light and then observed the colors close to spectral. 1840 - Herschel observed color formation on chlorine-argentic paper, which had got black in the sun before, under the influence of sun spectrum. 1847 - 1866 - Becquerel and Niepce de St.-Victor using interference phenomenon received spectrum image on a polished argentic plate that was treated with argentic chloride. 1891 - Lippmann generalized interference method and managed to receive color photos. He used transparent fine-grained light-sensitive layer where standing waves composed flaky deposition of argent which kept its structure thanks to gelatine. 1900 - Usagin demonstrated his color images of spectrum at the International Display in Paris. A digital camera is a device which registers radiation in three spectrum ranges. The question how exact one can reproduce the spectrum with measurements in three points goes back to 1861. The second historical excursus1861 - Maxwell demonstrated color imaging that had been received with simultaneous projection of red, green and blue slides on the screen. The third historical excursus1892 - Macdonough took out a patent for 4-color raster of colored grains of shellac on a celluloid substrate for additive color photography. 1894 Joly suggested a 3-color raster in the firm of colored lines marked on a glass plate (200 lines per inch), and described the method how to make a slide in natural colors which is printed from a negative when shooting through a raster and viewed through the same raster. 1907 The brothers Lumiere released plates "Autochrom" with 3-color raster of starch pressed grains which were located under emulsion panchromatic coating. 1913 Pedjet factory released a special 3-color raster which was pressed on a slide printed from a negative that was shooted via this raster. 1916 - debuting of raster plates "Agfa ultracolor" with mosaic irregular raster of colored gum-arabic particles included in collodion. 1932 release of the first film "Agfacolor" where the plate 9 X 12 cm in size had 100 million color cells. A classic photo marked the aim which should be reached by a digital photo: 100 megapixels, like in "Agfa" plates and the true color. In principle, filters which are situated in front of sensing elements can be of other colors, or they can be larger in number. This can be not bandpass filters, but band-exclusion filters: a filter that absorbs the red color range, and then there will be only blue color that would pass; a filter that adsorbs in blue range with yellow color passing, and a filter that adsorbs in green range with blue and red passing. There are some combinations of bandpass and band-exclusion filters. On the base of measurements of these filters we can try to reproduce a real color image. But all modern cameras record their measurements in JPEG or TIFF files in RGB model. So, if measurements are carried out not behind bandpass filters of blue, green and red colors, then calculated values are recorded in a file. The Kodak camera allows to set balance of white color not only for sun light, incandescent lamps or in manual mode on a gray area, but set a color temperature of a source from 2500 to 10000 K. 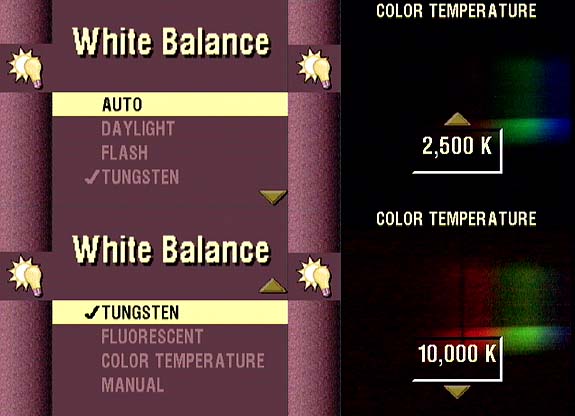 Shooting a spectrum of incandescent lamp and setting different values of color temperature on the camera you can clearly see how works an algorithm of color balance. 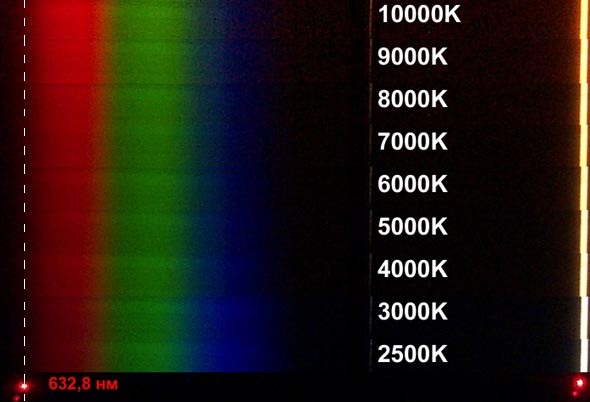 The pictures show the spectrum of a halogen lamp obtained with a diffraction grating. The aperture is F:2,8; exposure is 1/10 s. As a reference point we used diffraction on the same grating of radiation of helium-neon laser. The red point corresponds to the wavelength of 632,8 nm. When changing a color temperature in the camera menu the color of slit changed as well, and the whole spectrum shifts relatively the red point at the expense of changing of multiplication factor in blue and red channels. So, if we set 10000 K, we can clearly see a signal that corresponds to long wave spectrum range. However, in case we increase sensitivity in red range, there appears a lot of noise. If we set 2500 K, what corresponds to usual incandescent lamp, the camera "thinks" that the red range possesses more energy, and it lowers the sensitivity of red channel. And in this case we can't fix the light with wavelength more than 600 nm received with decomposition of incandescent lamp light. Despite the power of the laser constituted only 3 mW, it turns to be much more then we are able to receive in this spectrum range with a 250W incandescent lamp after passing a slit and decomposing with the diffraction grating. In short-wave range the camera doesn't replace monochromatic colors with magenta ones, leaving this possibility for users and programs. ConclusionThis is a very compact and comfortable camera. It has quite logic control, high quality imaging, very convenient side ratio (3:2) for printing. Today this 3X megapixels camera are equipped with the latest features for control via computer. As for lowlights, it lacks of manual focusing, of possibility to use IBM Microdrive and it can't serve as a universal device for reading CF memory cards. The complete set includes a very good program Panorama Maker 2000 from ArcSoft, which you can purchase separately as well. Technical characteristics
Photo examplesWrite a comment below. No registration needed!
|
Platform · Video · Multimedia · Mobile · Other || About us & Privacy policy · Twitter · Facebook Copyright © Byrds Research & Publishing, Ltd., 1997–2011. All rights reserved. |