The new Epson's line of photo printers which consists of Stylus Photo
950 and Stylus Photo 2100 printers was already reviewed by my colleagues.
I'm not going to describe design of the printing head and other technical
pecularities once again, I will just share my impressions of the EPSON
Stylus Photo 950 printer after using it for a week. This printer, which
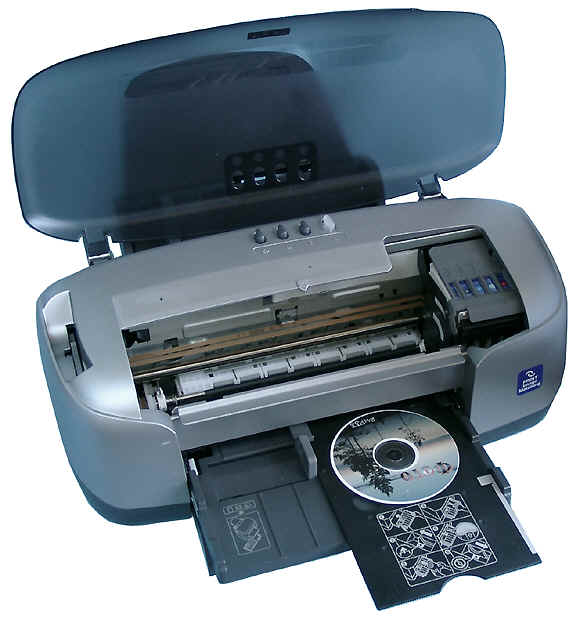
is flagship among the A4 models, is unusually big - as big as almost A3
models, for example, EPSON Stylus Photo EX. It's because it uses 7 individual
capacious cartridges for each color: 2 black, cyan, magenta, yellow, light
cyan, light magenta. As this model allows for borderless printing it's
necessary to shift the printing head out of the A4 sheet borders; that
is why this printer is so wide. Besides, the printer has a separate paper
roll holder and a sheet feeder, it can be connected with a paper cutter
and catcher for automatic trimming of roll media and a tray for printing
on CDs or cardboard. The printer I tested has 2 identical black cartridges,
but the inks are consumed at a different rate. Probably, like in the 2100
model designed for printing on A3 sheets, it uses cartridges with different
black inks, however neither the description nor the driver mention it.
As the black inks are identical, it's difficult to say which cartridge
is used for one or another print-out. Reportedly, the Stylus Photo 2100
uses also gray ink - a response of Epson to Lyson,
but only in the A3 model.
All cartridges have chips controlling the ink consumption, that is why
you can replace the cartridge coming to the end in time not to spoil an
expensive large sheet of paper.

As I have said, the format can be really large, because only the is
limited, and the length can be as great as you want. The Photo Quicker
3.1 program coming with this printer easily solves problems of how to place
photos on a sheet of paper. Next to photos you can look through their shooting
parameters. It's also possible to print shooting or other data into the
shots. However, the buttons Apply to a certain shot and Appry To All have
identical results in case of printing on roll paper and they apply a chosen
option for all shots of the series.


In my opinion, the most interesting modes are fixed width ones: horizontal
and vertical. In this case an image gets scaled for the whole width, while
the length is a result of it. The program is able to evade limitations
connected with length of panoramas. For example, the panorama 222 cm long
was divided by the program into 5 pages and printed out on the A4 roll
paper without borders at 37 minutes. That was my own record in panorama
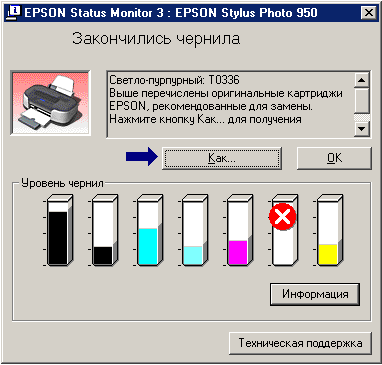
printing on A4 models and I could have held a new one if the light magenta
ink hadn't finished.

Note that the inks are monitored not only before the printing starts
but also during it. The indicator warned me the ink was finishing during
printing the panorama. The roll printing is very convenient, it allows
us to get classic photo formats saving on paper, as well as to organize
flow production. It's especially important for 10x15 photos on 10cm wide
roll paper. The menu contains a wide choice of various roll paper, but
I have seen just few on the shelves (10 cm wide, A4 and A3).
The printer is equipped with a cutter and a finished prints collector.
The cutting precision is very high. You can calibrate and adjust it.

However, EPSON has some problems to solve. Although roll paper
is supplied independently from sheet one, and it's unnecessary to replace one
feeder with the other, like it was in the previous models (870), the printer doesn't
inform a computer which feeder contains paper at the moment, and you can accidentally
start printing on the wrong paper. Taking into account a bi-directional interface
with a computer, I hope it will soon be corrected.

CD printing

There is a special tray for printing on 5" and 3" CDs. Images for CDs
are made with the Print CD program.

Its capabilities will satisfy even a very demanding user. However, do
not rely on it if you want just a fragment of a photo to be printed out
on a CD. The problem is that any photo loaded into the program will be
adjusted to the disc size. If you choose just a part of it, whatever resolution
of the original photo is, only the recalculated and reduced to the disc
size copy will be enlarged. It may result in squares on an image. That
is why you should cut out the fragment you need in another editor and only
after that process it in this program.
 
|
| Original image |
Image printed out on a CD, after being scaled |
Printing quality
The new printing head allows for the maximum of 2880 x 1440 dpi. The minimal
drop volume is 2 pl. The photos show shots of a gray field made with a
microscope at 10% absorption, printed in 2880 and 1440 dpi. To estimate
the scale we also shot a stage micrometer at the same resolution. The step
between the long lines with figures is equal to 0.1 mm. This is the limit
a human eye is able to discern from the distance of 25 cm. Although there
is difference between the resolutions of 2880 and 1440 in both cases the
resolution is much higher than can be discerned with the naked eye.

For subjective estimation of the printing quality we carried out the
following experiment. We printed out photos of 10x15 cm of the same object
made with a 6Mpixel camera, a 3Mpixel one and a 3Mpixel one recording half
of a frame. And then we offered that strangers estimate the quality. The
most of them didn't choose the photos made from the largest frame, though
if you look through the magnifier you will be able to see which photo was
made of the best-quality original shot.
One more criterion for quality estimation is a scanning resolution at
which it's possible to get a high-quality photo without using special methods
of raster deletion. In our case it was 600 dpi. I.e. twice greater than
necessary to discern all details of a print-out.

Scanned at 600 dpi.

Scanned at 300 dpi.
Conclusion
According to the size and price, the printer is meant for small photo studios.
It allows printing high-quality photos at one stroke, a series of photos
quite quickly and decorating a CD with source frames. It will also be interesting
for studios dealing with photo digital processing. Taking into account
that A3 print-outs are expensive, it's better to have two printers instead
of using a wide model for printing small photos.
Write a comment below. No registration needed!


