 |
||
|
||
| ||
Intermediate snapshots in the team competition in image sampling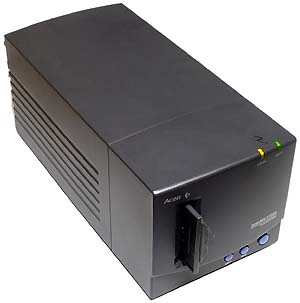 The scanner from Acer, which will be a subject of the today's review, has taken a barrier of $300. For a scanner with 2700 dpi and 12 bit per channel ADC this price is nearly twice lower than that of the previous models. That is why before we turn directly to the subject, I will give your results obtained in the competition in image sampling. Competition in image samplingRulesIt is necessary to receive a digital image of a definite object. A relay-race team implementing image sampling can include any number of participants. We estimate the number of details of an initial image which can be distinguished on its digital image. Participants
In the preliminary round of the EOS D30 + Volna and the Kiev 88 + Volna + Polaroid we revealed an absolute outsider. It was a team with the Polaroid set. The photo allows distinguishing about 100 strokes per cm, which is three times worse than a resolution of plain photo paper. Let's count the number of details, for example, rods of a garden fence with a thickness of rods equal to the distance between them, - in this case the number won't exceed 400, while the Canon EOS D30 with the same lens gives us around 700 rods. 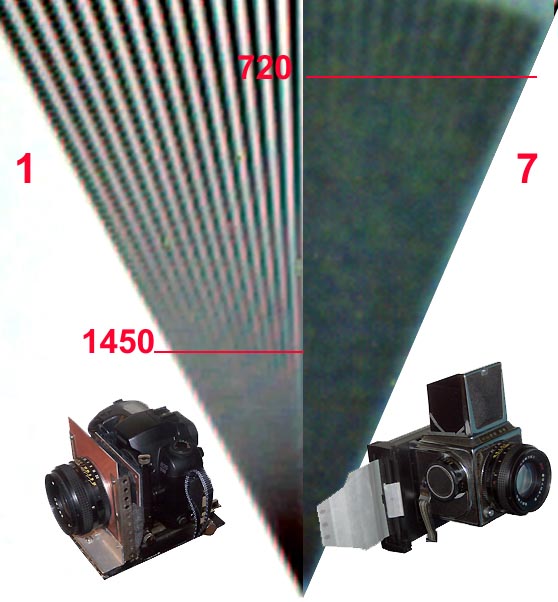 For better comparison all shots are interpolated to a single still width - 7180 pixels. The Polaroid set hasn't made a positive impression on me. The instantaneity of this process is not good, the developing process takes 90 s, lack of a wet stage is also conditional since the paper separated from prints is impregnated with so caustic solution, that touching any photo spoils the latter at once. 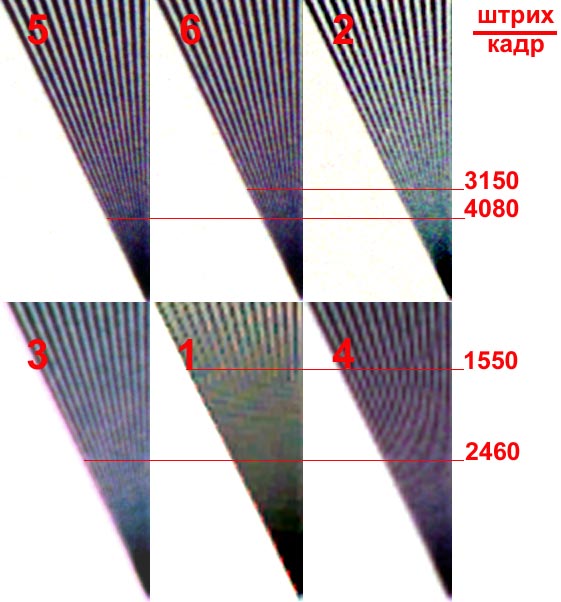 For better comparison all shots are interpolated to a single still width - 7180 pixels. The more tiny the details which can be distinguished on the resolution chart, the more strokes we can see on the full shot. A black and white strokes make 2 strokes. In the final part of the competition the team # 5 has won, it has the largest sheet of photo paper. Scanned at 600 dpi it has shown the result 30% better than that of the teams sharing the 2nd and 3d positions: the team #2 including the Acer ScanWit and the team #6 with the same large sheet of photo paper (20X30) scanned this time at 300 dpi. We expected such results since the 2700 dpi scanning resolution given by the Acer ScanWit, and 300 dpi provided by the NeuHaus 9600 differ 9 times, i.e. the same difference as between the print and the shot. The detailed analyses of the Acer scanner results has shown that the maximum resolution can be achieved in the green channel, and the lowest one - in the red channel. The fourth place was taken by the team # 3 which includes the 10X15 cm photo paper and the NeuHaus 9600 scanning at 600 dpi. The low resolution of the mat paper prevented the team from struggling for the first prize. The 5th and 6th places were shared by the team #1 (the EOS D30) and team #4 (the 10X15 print scanned at 300 dpi). 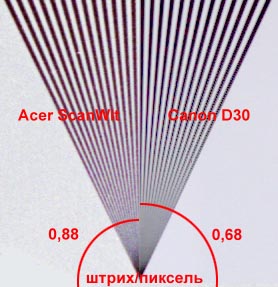 You can see that the fragment of the shot coinciding with the matrix in its square has nearly the same number of pixels as a snapshot of the digital camera, but the scanner has a better stroke/still ratio. This advantages is received at the expense of the green channel. That is why while one can get an image of the full still with pixels more edgewise by a factor of 1.66, there are 2.15 more strokes which can be distinguished on the scanned image at the expense of a better stroke/still ratio. 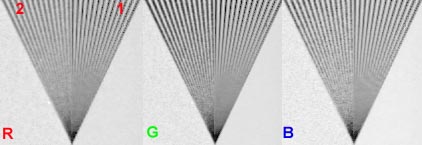 Summary table
CommentsThe winner shot ahead into the first place performing better than the second finalist by a 30% margin. In fact, you can achieve the maximum number of strokes from a fine-grain film of 100 ISO sensitivity by scanning a 20X30 print at 400 dpi. It means that a film scanner has to provide 3600 dpi resolution to take the lead. There are, certainly, less sensitive films with finer grains which work in devices with vacuum clamping of a film to a film channel, for example, the Contax RTS III with too expensive optic system from Carl Zeiss; they may need even a greater resolution. But if we had had our mind to use 200 ISO films, we would have failed marking out a winner. The hero in detail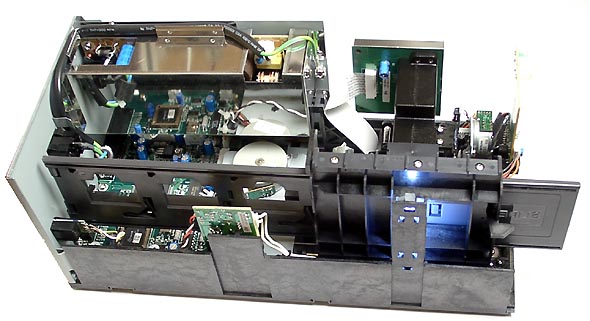 Let's first of all look inside. Here we can see three engines. One moves the lens thus adjusting the focus, the second moves the film in course of scanning, the third one moves a holder for frames or films providing shot changing. 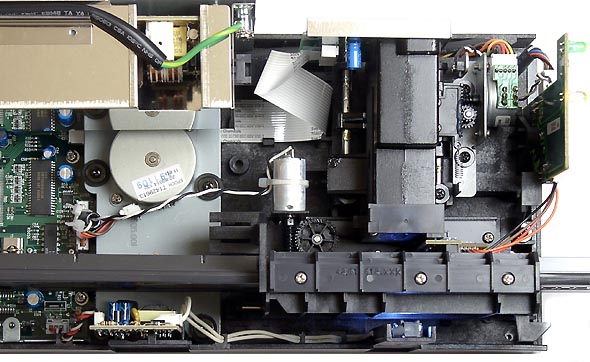 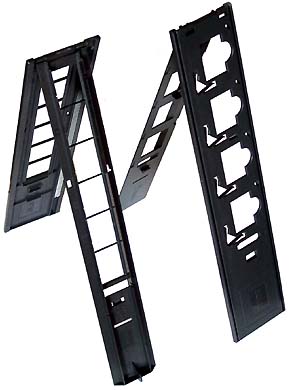 The scanner is equipped with two holders: one is for a film 6 still long, the other is for frames with slides. The holders are not that bad, the only small disadvantage is that such strong springs can deform cardboard frames. On the whole, the mechanic and optical parts look very solid, not worse than those of much more expensive models. A low price of the scanner is accounted for by the fact that it refuses implementing the others' job. The scanner connects a computer via SCSI provided and transfers all the information obtained. After that all operations are implemented by the computer and the required software. I connected a scanner to a P200 MMX based computer with 64 MBytes RAM and to a PIII 550 based machine with 256 MB memory. The rate of the preliminary viewing wasn't different and constituted 13 sec. The scanning in the mode "8 bit, high speed" on the first machine took us 1 min 20 sec, and the whole process with the data transfer to the Adobe Photoshop took 2 min 22 sec. On the second machine these processes took, correspondingly, 36 and 40 sec. In the high quality mode the scanning with 12 bits per channel gives the following results: the scanning process - 5 min 32 sec, the whole process with data transfer - 10 min 47 sec. On the second computer the results are, correspondingly, 1 min 7 sec and 1 min 12 sec. I should note that the Adobe Photoshop works with 16-bit data. That is why 12 bits are converted into 16 when transferred into the computer. The TWAIN-driver MiraPhoto 1 shipped together with the scanner has some drawbacks, so you'd better download the second version from the company's server at http://www.acercm.com.tw/global/service/scan/drivers.htm. 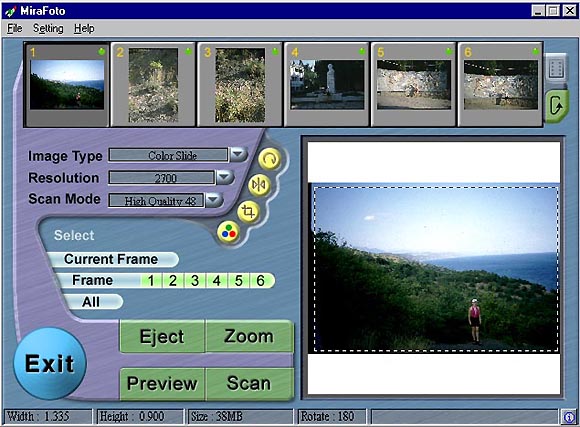 It is interesting that while in the first version of the program the bit capacity is specified as 36 bit (or 12 bit per channel), the second version works with 48 (i.e. 16 bit per channel). It is clear that a rework of the program hasn't extended a bit capacity of the ADC, but now a user won't torment himself over such questions as why he is scanning with 12 bit capacity, and in the Adobe Photoshop it is 16 :-)). Note that the Adobe Photoshop has scanty possibilities of working with a 16-bit color, and the lower the version, the worse the possibilities. The 6th version provides much less service than the 5th one. You can not only correct images, but also attach some filters. Apart from the native drivers, the scanner can work with programs from other manufacturers, for example, the VueScan from Hamrick (http://www.hamrick.com/ ). 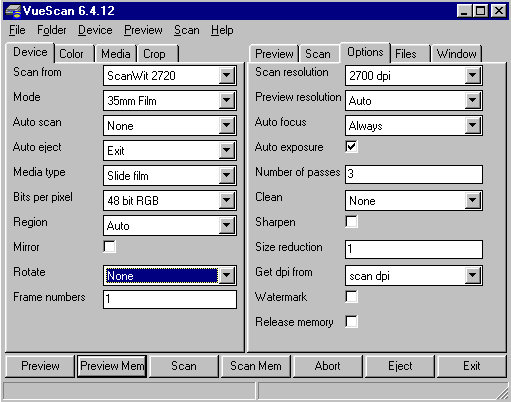 If you are working with a separate shot and want to obtain the maximum possible quality, then there is no a principle difference what program you are working with. You have to refuse all offered services and transfer all data from the scanner to a computer as they are, and then process them yourselves in the graphics mode. If you need to scan a great deal of data in a packet mode, then take the VueScan since it gives a bit more possibilities, in particular, you can set a focus adjustment for each still (the MiraPhoto sets the focusing according to the first shot when working in a packet mode, and doesn't adjust the lens when taking other shots). The device knows also about a great variety of settings for different films, including positive ones, unlike the MiraPhoto. At last, the VueScan can work in a multipass mode. Here is one example of what gives you a possibility of working with a 12-bit color. If a shot is ideal, and you have accurately set all scanning parameters, then it yields little. If a shot has a large density gradient or it is over-exposed or underexposed, then you can improve the situation processing details both in shades and in the light; and after conversion into 8-bit color the brightness bar chart won't look like a saw with broken teeth. 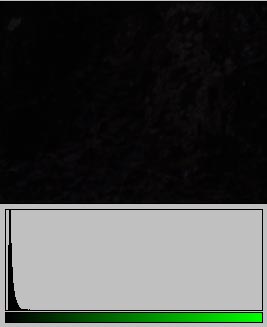 The initial slide. 16 bits. A bar chart of pixel brightness of the green channel. 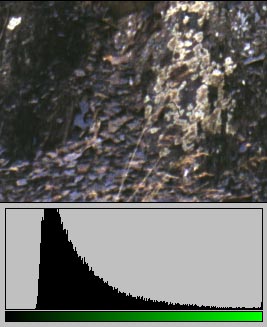 The image after processing. The image was first corrected as 16-bit and then converted into 8-bit. 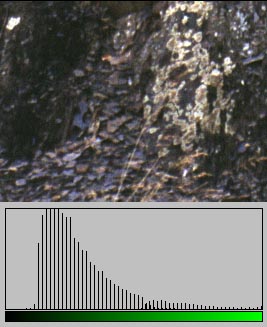 The image was first converted into 8-bit and then corrected. ConclusionThis film scanner, comparable in price with good
flatbed models, can work with modern films of 200 ISO sensitivity
without losses in quality, as well as with archives on old films.
Of course, it requires a powerful computer, but who works today
with graphics on a weak machine?
Write a comment below. No registration needed!
|
Platform · Video · Multimedia · Mobile · Other || About us & Privacy policy · Twitter · Facebook Copyright © Byrds Research & Publishing, Ltd., 1997–2011. All rights reserved. |