
This quite inexpensive ($2,200) universal projector from Philips possesses pretty good characteristics. Probably, only the lack of the low-brightness mode makes presentations its main target.
The projector came with a power supply cable and an instruction sheet. According to the user manual we got from the Net, the projector will ship together with the following stuff:
European package:
There is also a Brilliance package which also includes a bag and a remote control with an integrated laser pointer.
| Projection technology | LCD |
| Matrix | 0.7", active TFT, 3-panel, 4:3 |
| Matrix resolution | 800x600 |
| Lens | 1.2x zoom, F = 1.8-2.2, f = 28.4-34 mm |
| Lamp | 132 W UHP |
| Lamp service life | 6000 hrs |
| Light flow | 1500 lm (ANSI) |
| Color depth | 16.7 M colors |
| Contrast | 300:1 |
| Projected image size, diagonal, 4:3 (distance to the screen at zoom extreme positions) | 1 m min. (1.5-1.9 m) |
| 6.4 max. (9.7-11.9 m) | |
| Inputs |
RGBS-SCART supported |
| Outputs |
|
| Scan frequency | horizontal 15-108 kHz |
| vertical 50-120 Hz | |
| Input signal formats | TV: NTSC 3.58, NTSC 4.43, PAL, PAL-M, PAL-N, PAL-60, SECAM |
| Component video signals Y/Cb/Cr (Y/Pb/Pr): HDTV, SDTV, DVD (480i/480p/576i/720p/1080i) | |
| Analog RGB signals: VGA, SVGA, XGA, SXGA | |
| Integrated sound | 6 W, mono |
| Noise | 27 dB |
| Dimensions | 235x108x335 mm |
| Weight | 3.7 kg |
| Power consumption | 170 W, 5 W in sleep mode |
| Power supply | 100-240 V, 50-60 Hz |
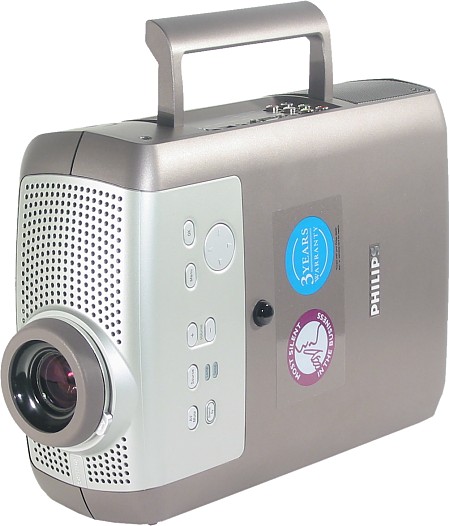
The projector has a plastic silvery-gray-brown body but for the light silvery panel in front.

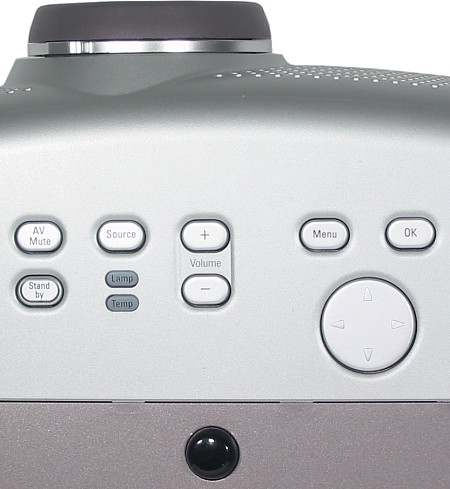
The design looks good and reminds a solid boombox. The metallic vents on its sides make it even more similar to it as usually such vents hide speakers. However, it does have one speaker on its left side. All connectors except the power supply one are placed on the right. On the back you can find a power supply connector and a Kensigton lock. Above are 7 ordinary buttons, one 4-way button and 2 LEDs. Under the Stand by button is one more LED.
The IR receiver is in the form of a semitransparent cap above. Theoretically it should receive IR signals from any direction in the upper hemisphere. However, we couldn't check it as we didn't have the remote control.
On its right the projector has a fold-out handle, and on its left are 4 small legs.
When the projector works it rests on two rubber-covered legs behind and one wide fold-out front leg. Its release button is located on the right side.
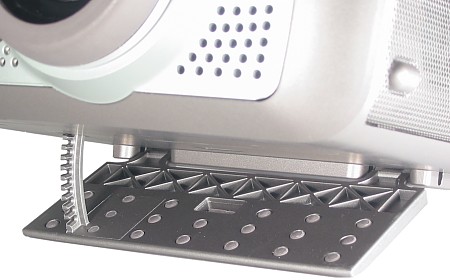
Such design won't let it slide along smooth surfaces, but remember that the height of the back legs can't be adjusted. The projector doesn't have threaded holes for corbels, so you have to use Philips' corbel for ceiling mounting.
We didn't receive the remote control, and this picture is taken from the user guide.
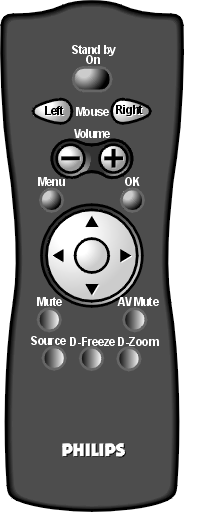
If you connect the RC to PC via the USB or PS/2, it will let you control the mouse pointer and emulate pressing the buttons.
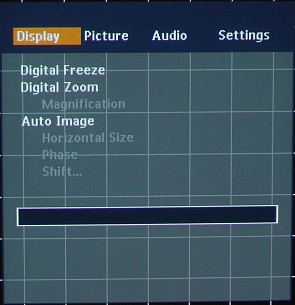
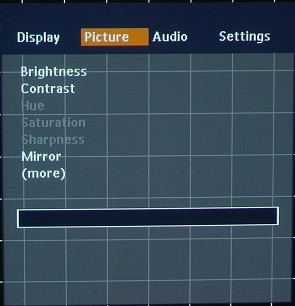
The screen menu is simple and intuitive. It consists of four pages (Display, Picture, Audio and Settings).
The Picture and Settings tabs are divided into two parts, and it takes some time to get to some settings. Besides, the response of the pointer buttons is not quick, and there's no faster way to switch from one tab to another. When you adjust image parameters the screen menu remains on top - and although it becomes semitransparent it doesn't let us clearly see the effect when we change the settings.
The signal sources can be switched in turn with the Source button on the remote control or projector. But this button is not always needed as the input detection function is enabled by default. You just need first connect the video signal source and then turn on the projector. The range of video-ins is good: VGA (mini D-sub 15 pin), component, S-Video, composite.
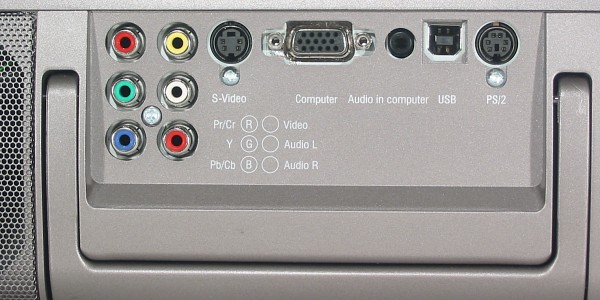
You can also connect equipment with the SCART connector, but in this case you will need a SCART to 4 RCA adapter. The component video-ins will have RGB signals applied and the composite input will get a synchronization signal. The projector lacks only a DVI input, but video equipment with such video-out is not widespread yet. The automatic adjustment for the VGA signal is enabled be default, it works quickly and correctly. If necessary, the adjustment parameters can be corrected in the menu.
The stereo minijack audio-in is active in case of PC connection, in other cases the audio source is to be applied to two RCA connectors. You can also connect an external monitor, for which you need an optional VGA splitter and to change Monitor Out for On in the Settings menu.
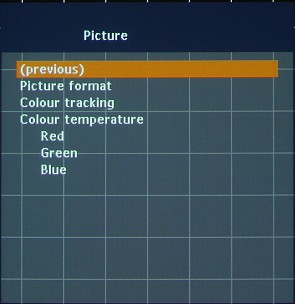
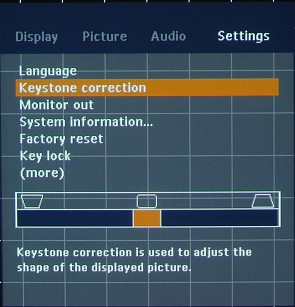
The outer rubber (extra protection) lens rim allows changing focusing, and a lever on the lens controls zooming. The lens is positioned relative to the matrix so that the image lower edge is 1/10 of image height higher the lens axis. Vertical keystone distortions can be adjusted only in the screen menu. In the Picture menu the Picture Format item controls image transformation modes. They are 5 in all: 4:3 - full-screen 4:3 format; 16:9 - image stretched to 16:9; 16:9 enlarged - only the central image part of the 16:9 is displayed; 4:3 on a 16:9 screen - 4:3 remains but the image is reduced to fit in a narrower screen, and 16:9 on a 4:3 screen - the image is vertically stretched to remove black space in case of the image format like LetterBox.
The current frame can be stopped with the D-Freeze button on the RC or Digital Freeze item on the Display tab of the screen menu. The Digital Zoom (D-Zoom button on RC) enables digital magnification. Magnification defines the degree, and the pointer buttons define the area to be magnified. The A/V Mute button on the RC temporarily removes the image from the screen and turns off the speaker.
In the Picture tab the Mirror item defines the projection type (front, / in transient light / ceiling mounting). As this is a long-focus projector, it can be located behind the audience.
The image settings are few: brightness, contrast, hue (only for NTSC signal), saturation and sharpness (two latter are not supported for VGA connection).
There are no preinstalled or user profiles. Brightness, contrast and saturation remain the same for each type of connection. The other image settings are automatically saved in two profiles: one corresponds to VGA, the other to all the rest.
In the Settings tab the Key lock allows locking buttons on the RC and projector. To leave this mode press and hold the OK button for 10 sec.
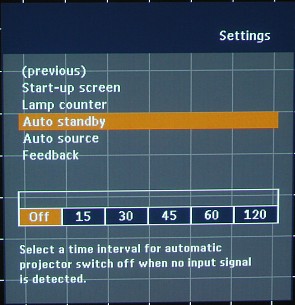
On the same page you can disable the startup screen image, screen text and enable the auto standby function.
The light flux, contrast and lightness uniformity were measured according to the ANSI technique.
The Colour tracking and Colour temperature were set one
step lower than natural and cool (see the explanation further).
Here are the results for the Philips bSure SV2:
| Light flux | 1260 lm |
| Uniformity | +6.4%, -26% |
| Contrast | 200:1 |
The light flux is not much lower than specified. The uniformity is satisfactory. The contrast is pretty good.
The speaker is loud, and the level of distortions is not great. Well, its specified power is 6 W and the sound goes through hole of the upper plastic panel but through the hard metallic grill. The volume level can be adjusted either with the buttons on the RC or on the projector's body or through the menu.
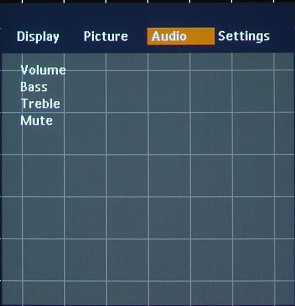
In the menu or by button you can turn off just the sound. The level of lows and highs can be adjusted only through the menu, though they are not of much use taking into account the small size of the speaker. Moreover, it's the quietest projector we have ever tested in our lab.

The projector was tested on the ASUS 9250VS under the Windows XP Professional with the Monitor Nokia Test 1 and 2. The PC was connected to the VGA jack via the DVI-VGA adapter with a VGA cable from the Samsung monitor.
The white field looks uniform. On the black field we noticed slight color patterns and a couple of greenish stains. Above the image is a light band parallel to the upper edge of the screen. The border between the pixels is pretty thin. The geometry is ideal. Any of the pixel grids can be perfectly reproduced. The gray scale has sufficient gradations, and at the Colour tracking and Colour temperature set to natural and cool there's almost no deviations from gray, only the lightest gradations are a little yellowish (but it can't be corrected). The colors are bright, saturated and well balanced. The chromatic abberations make around 0.5 pixels, but in the lower right-hand corner the colors deviate by more than 1 pixel. The maximum vertical frequency at the original resolution of 800x600 is 200 Hz (above 150 it looks blurry), at 1024x768 it makes 140 Hz, at 1280x960 it's 85Hz and at 1600x1200 it's 60Hz.
The tests were carried out with the top-end DVD player from Pioneer, DV-757Ai (~$1000), with the DACs of 12bit/108MHz and the progressive scanning (in NTSC). The component signal was applied with the 1m cable Supra AV3 (~$100/m, Sweden). We used high-bitrate DVD movies, Video Essentials DVD (NTSC) with samples of static and dynamic scenes and test tables, and a DVD-RW (PAL and NTSC, 8 Mbit/s) with original test tables.
The resolution was over 540 TV lines independent of the connection. The color definition was 90 at the composite connection, 130 in case of S-Video and about 200 lines at the component connection reaching 270 lines (horizontal) with the progressive (480p) video signal. The test tables with monochrome color fields and gradient fill had correctly rendered colors, were bright and had no artifacts. By adjusting brightness and contrast it's easy to make details in the dark and light fields looking clear. The Sharpness hardly affected the image in case of the component signal, but with the composite and S-Video signals the image looked sharp at the average level of Sharpness. At the minimal value the horizontal clearness looked a bit worse and at the high values it got artifacts. The projector converts an interlaced signal into a progressive one using a simple algorithm. So there's a flicker on the static picture.
In case of the SECAM signal (TV video-out) the projector demonstrated stable and clear pictures with correct colors.
We looked through several fragments of the DVD movies of different quality to estimate the theater effect.
At the format of 4:3 the pixel grid doesn't attract attention, but in case of 16:9 and over the vertical resolution seems to be insufficient. The worst disadvantage in the theater mode is a relatively low black level. It's not because of contrast (200:1 is considered to be good enough for LCD projectors), but because of a solid light flux which is useful for presentations in light rooms but not for movie watching. A low-brightness mode would be to the point, but it's not supported. As a result, the dark scenes look too light, and the gray space above and under the pictures of the side ratio over 4:3 make you less involved in the events. However, there's a way to visually increase the black level. You should made the screen as high as the image to remove the gray fields, and lighten a little the space behind the screen, but not the screen itself. In this case the black color on the screen will look the darkest for you.
Let me separate the advantages and disadvantages of this projector for presentations and theater mode.
The Philips bSure SV2 looks a good multimedia device for presentations,
but the theater mode can't be considered its prevailing field of utilization.